
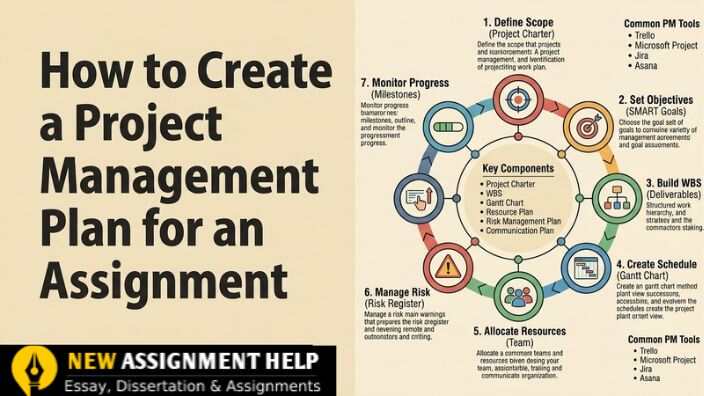
How to Create a Project Management Plan for an Assignment
- 8 Essential Steps to Write a Project Management Plan
- 1. Understand the Project Requirements
- 2. Define Project Objectives and Scope
- 3. Develop a Work Breakdown Structure
- 4. Create a Realistic Project Schedule
- 5. Estimate Resources and Project Costs
- 6. Identify Risks and Plan Mitigation Strategies
- 7. Establish Quality, Communication and Monitoring Arrangements
- 8. Organise and Present the Project Management Plan
- Final Thoughts
8 Essential Steps to Write a Project Management Plan
A project management plan is a document that shows how a project will be organised, timed, paid for and protected from risks. In your assignment, it joins activities, resources, timelines and risks into one clear story. And when you are writing one, you need to outline your scope, set clear objectives, build a work breakdown structure and establish a baseline using structural tools. Markers want to see how each part works with the others. Here are eight easy steps to build one. Let’s start with the basics.
1. Understand the Project Requirements
Read your brief and marking criteria closely, as they tell you what your marker expects. Then pull out these details:
- The project background and expected deliverables
- What the stakeholders want
- Limits, assumptions and constraints
- The plan format your module asks for
Say your assignment is a new laboratory installation at a UK university. You would note the facilities needed, the budget, the deadline and the safety rules. Once the requirements are clear, you can set your goals.
2. Define Project Objectives and Scope
Objectives say what the project will achieve. Scope says what work is included. So, write your objectives using SMART: specific, measurable, achievable, realistic and time-bound. Then list your deliverables and draw clear boundaries. Mark which tasks are in scope and which are out. Add success measures you can check later.
For a solar panel project, an objective could be to install a set amount of solar power within an approved budget and timeframe.
Be careful here. A vague scope causes confusion, big expectations and scope creep. When the scope is fixed, you can break it into smaller pieces.
3. Develop a Work Breakdown Structure
A work breakdown structure (WBS) splits a big project into small jobs. Think of it as a map. Build it in four moves:
- Break the project into major phases.
- Split each phase into work packages.
- Name who owns each activity.
- Show how the tasks link together.
A construction WBS might include planning, procurement, site preparation, construction, inspection and handover in a project management plan. This map could be the base for your schedule, costs and resources, so get it right first.
4. Create a Realistic Project Schedule
A schedule puts your tasks on a calendar. Thus, give each task a length of time, then show which tasks depend on others. Add milestones and deadlines. A Gantt chart shows all this in one picture. Critical Path Analysis then finds the tasks that cannot slip. If one of them runs late, the whole project runs late.
For example, construction cannot begin until site preparation and approvals are also done.
Make sure to explain your chart in words. Now, you need to know what your schedule will cost.
5. Estimate Resources and Project Costs
Every task needs people, tools and money. This table shows what to cover:
| Resource | What to include |
|---|---|
| People | Roles and responsibilities |
| Equipment and materials | Tools, supplies and software |
| Direct costs | Items tied to the project, such as materials |
| Indirect costs | Shared costs, such as admin and electricity |
| Budget | Money for each phase, plus a contingency amount |
A contingency is a small pot of money kept aside for surprises. Always back up your numbers. Use sensible assumptions and real evidence, like supplier quotes or figures from past projects. Costs are only half the picture, because things can still go wrong.
6. Identify Risks and Plan Mitigation Strategies
Every project faces uncertainty, so make sure to plan at early stages. A risk register is a simple table that tracks each risk. Use it to:
- Spot technical, financial, operational and schedule risks
- Rate how likely each risk is and how much damage it could do
- Focus on the high-risk activities first
- Plan ways to reduce each risk, plus backup options
- Give every risk an owner
Here is an example. Equipment delivery might arrive late. You could talk to suppliers early and line up a second source. Good plans expect problems. Now let’s keep everything on track.
7. Establish Quality, Communication and Monitoring Arrangements
A plan only helps if it stays workable. Three small arrangements keep it that way.
- Quality management: Set clear standards. Plan inspections and reviews. Choose measures you can actually check.
- Communication management: List your key stakeholders. Decide how often you will report. Say who is responsible for sharing what.
- Monitoring and control: Compare real progress with the plan. Watch the budget, the schedule and the deliverables. When something drifts off course, note the fix.
Together, these three keep your plan alive from day one to handover. All that is left is putting it on paper.
8. Organise and Present the Project Management Plan
Here is a simple layout you can follow:
- Project background and objectives
- Scope and deliverables
- WBS and project schedule
- Resource and cost estimates
- Risk management plan
- Quality and communication arrangements
- Monitoring and control
Big charts and registers can go in the appendices if your brief allows it. That keeps the main text neat and easy to read. As always, check your brief and your university’s referencing style before you submit.
Final Thoughts
A strong project management plan links objectives, tasks, resources, schedule and risks into one clear approach. Use realistic assumptions and goals you can measure, and your marker will see the thinking behind every choice. You can also seek project management assignment support for better understanding.